All of this Mac and Apple display news today made me so happy, I wondered if perhaps it was a belated April Fool’s Day prank. Thankfully not.
Apple is currently hard at work on a “completely rethought” Mac Pro, with a modular design that can accommodate high-end CPUs and big honking hot-running GPUs, and which should make it easier for Apple to update with new components on a regular basis. They’re also working on Apple-branded pro displays to go with them.
I’m a devoted MacBook Pro user, but Apple’s commitment to Mac Pros, and the software that runs them, is fantastic news for all Mac users. And I’ve long felt that the Mac Mini is an under appreciated gem, so I’m delighted it will remain in the lineup.
Anyone who has asked me for help setting up their new Mac or transitioning from the horror of Windows to the wonder of Mac knows that one of the first things I do is show the initiate how to listen to podcasts and subscribe to Mac Power Users. It’s a must-listen for all Mac users, from beginner to expert.
We had a great discussion about integrating your Mac into a Windows corporate environment, and other Mac-related topics.
Because I am the only tech-interested person amongst my real life friends, I often get asked tech questions, and am occasionally asked for recommendations with respect to hardware, software and ways ways to use the same.
I thought it might be time to do a series of posts describing the primary hardware and software I use in my day-to-day life to get things done, to make life easier, and to have fun. Let’s start with computers and backup. Then we’ll move to mobile devices, software and apps.
Primary Computer
My primary computer is an early 2015 MacBook Pro, with a beautiful retina display. For many years, I was a dedicated desktop computer user. I’ve always had an ancillary laptop- for the last several years a 2011 MacBook Air. But until recently, my laptop was used as a secondary device, mainly for use on the road or for light use on the couch. I couldn’t help but notice, however, that much of the rest of the world, including the rest of my family, was rapidly gravitating toward laptops as primary, full-time computers. Since I travel reasonably often, for business and to give speeches, and since I am spending more and more of my non-work time at the farm, I began to wonder if I could be happy with a laptop as my full-time device. Several months ago, I went to the Apple Store and looked at the retina MacBook Pros, and quickly concluded that I could. I am deliriously happy with my MacBook Pro. The solid state hard drive is fast, the screen is a work of art, and it’s great having all my apps and data with me all the time. I’ve also enjoyed the move from a desk chair to full-time couch computing.
Grand Central iMac
My 2014 retina iMac, which was previously my primary computer, has now become command central for administering and distributing my data, movies, music and home network. For example, my Fujitsu ScanSnap iX500 scanner (the best scanner on earth) remains connected to the iMac and I scan most of my documents (I have long been almost completely paperless) to that iMac. I have Hazel (the first application for people looking to take control of their Macs) rules set up to OCR and manage the scanned documents (including incoming files scanned on other devices, which I move to the iMac via Dropbox).
This may sound complex and hard t0 set up, but it’s not. Here are all the steps needed to set up the scanned documents management I just described.
1. Create a primary folder on the computer where you want to store your documents (in my case my iMac) to receive your scanned documents. I have one called Document Inbox. Scan your locally scanned documents to this folder. Create a Hazel rule to monitor this folder, OCR any new documents that are added, and add a specific color tag (so you can visually see the documents that have been OCR’ed via Finder).
2. Create a synced Dropbox folder on all your computers to receive and manage documents scanned from other computers. I call mine Remote Scans. Create a Hazel rule on the computer where you want to store your documents to monitor this folder, and move (not copy) any added documents to the folder you created in step 1. Scan or move your remotely scanned documents to that folder.
3. From time to time (I do this once every couple of months), go through the folder you created in step 1, and rename (optionally) and move (again, not copy) the documents to their final storage location, in my case subfolders in my Scanned Documents folder, which resides inside my Documents folder. Those lucky many less anal than me could simply leave all the scanned documents in a single folder and rely on search to find them as needed. I’ve got so many years invested in organizing my documents by type, I am not emotionally ready to combine them into a single folder, but it would be much easier, and logic tells me that might be the way to go.***
4. Set up file sharing on the computer where your scanned documents will reside so you can access the scanned documents from your other computers on the network. I have the folder on my iMac mounted in Finder on my MacBook Pro, so I can view, move and manage the documents from my laptop, when I’m on the same network (e.g., at home). In fact, I do almost all the renaming and filing work described in step 3 from my MacBook Pro. Set up permissions to require your computer password (e.g., “connect as” your user account on the computer where the documents are stored) to keep your scanned documents safe from network creepers.
*** You can create all sorts of Hazel rules to rename and move documents automatically, but it takes some geekery, and in my experience only works sporadically. If you want to explore this magic, Brooks Duncan is the place to start. His Hazel webinar is highly recommended. As is David Sparks’ paperless field guide.
I use Carbon Copy Cloner (the best clone and sync application) to keep the Documents folder on my iMac synced with a folder on my MacBook Pro. Carbon Copy Cloner allows me to create a clone job that occurs whenever my MacBook Pro and iMac are on the same network (e.g., when I’m at home).
click to enlarge
I also keep my primary Photos app (formerly iPhoto) library on the iMac and sync it to my laptop and other devices via Apple’s photos in the cloud service.
I keep my active text files (via Pages) and spreadsheets (via Numbers) synced via iCloud, and I keep my historical documents, song demos, songs-in-progress, Garage Band files and archived data in subfolders in the aforementioned Documents folder. To allow for moving things around (including to and from my dreaded and mandatory Windows work computer) I have a designated Google Drive folder (which I call Transfer) that resides in my Finder sidebar, and in whatever they call the Windows equivalent (the Windows Explorer sidebar?).
I use Spotify for most of my music needs (here’s Rancho Radio, my actively managed and hand-crafted station; try it, you’ll like it), but because I’m a musician and, mostly, because I’m old, I have many tens of thousands of MP3s. I keep those archived on my iMac and accessible in the cloud, thanks to Google’s most-excellent Google Music service. If you have a lot of MP3s to manage, it is clearly the best choice. I keep selected parts of that collection on dedicated flash drives that I plug in to the applicable computer to play via my beloved Sonos system (I’m getting ahead of myself, but the highest and best use for old iPads and iPods is as a dedicated front end for Sonos). Here’s what I’m listening to now, courtesy of an old iPad I’ve repurposed.
Backups and Content Serving
Additionally, I use Carbon Copy Cloner to back up both my Documents folder and my Photos library from my iMac to an old Apple Time Capsule (previously my primary backup device) and to the third device in my computer array- a Synology DiskStation DS415play, which I use to back up my data and to serve videos and music to my house (and afar) via Synology’s excellent iOS and web apps. All of this is automated, and happens on a designated schedule.
I also back up my MacBook Pro, via Time Machine, to two separate encrypted external hard drives attached to my Apple Airport Extremes (which also serve as my routers), one at home at one at the farm. This allows duplication in separate locations. My iMac is backed up to that same external hard drive at home, and to the Synology DiskStation (again, for duplication). I am not as backup paranoid as some, and have never restored a complete drive from a backup (I would simply copy back the documents and files I need), but it’s so easy to backup with my system, I can achieve redundancy with very little effort.
Online Backup
Historically, I have backed up the data I care about (e.g., files, photos, videos, song demos, music, etc.) on my iMac to Amazon Glacier using Arq, as outlined here. While that process is cheap and easy, I will probably move my cloud backup either to Amazon’s Cloud Drive (unlimited for $60 a year) or Google’s new photos service (at least for videos, which are, by far, the largest component of my backup jobs, and maybe for photos if Apple continues to overcharge for cloud space).
I know this sounds like a lot, but it was surprisingly easy to set up. At the end of the day, it gives me redundant local backup, as well as offsite backup for the data I care about.
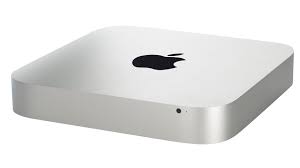
Behind the Lines: Mac Mini
Oh, and last and definitely least at least in terms of size, I have a 2014 Mac Mini in my downtown office, which I use to do as much office work as possible on a Mac. I’ve spent a lot of time trying to insert my Mac workflow into a locked-down Windows environment. There’s no perfect way to do this, but as Macs continue their glacier-like move to enterprise, I’m hoping it will get easier. Maybe I’ll do a post in this series about all the work-arounds I’ve hacked together to use my Mac in an enterprise environment. Just finding a way to play old Lucent voice player files (the format many of my archived voice mail messages are in) was a months long crusade. But, hey, I won (my battle was fought with the persistence required to find a copy of the long ago deprecated Lucent Voice Player, and the very handy Mac app CrossOver). So there.
One of the multitude of things I love about Macs in general, and my retina MacBook Pro in particular, is the photo editing application, Pixelmator. For many years I was a semi-dedicated Photoshop user. But Photoshop is expensive, and I have a natural dislike of pay-as-you-go applications. A few months ago, I decided to dump Photoshop and go all-in with Pixelmator. Like any good geek, I looked around for a series of tutorials to get me started. Drippy Cat has an excellent series of Pixelmator tutorials, freely available on YouTube.
Here, for your and my perusal and reference, are links to Drippy Cat’s excellent Pixelmator tutorials:
I was surprised by how powerful Pixelmator is. It can do everything I need and more. You can even import and open your existing Photoshop files. In short, unless (and even if) you are a professional photographer, I see no reason whatsoever to rent Photoshop monthly, when you can buy Pixelmator for only $30.
I’ve been a Chrome browser user for a long time. It’s a great browser, but my love for all things Apple occasionally leads me to attempt the switch to Safari. There’s a lot to like about Safari- it’s fast, and it is deeply implemented in the OS X environment, via Reading List, iCloud, etc.
So recently I gave it another try. I spent some time setting up Safari on my Macs, installing my must-have extensions and getting the very customizable menu bar just the way I like it. And I used it exclusively for a week.
While any new app is a bit of an adjustment, it is now clear that I could easily make the switch to Safari, except for one extremely frustrating, completely unnecessary flaw that makes an otherwise elegant and well-designed piece of software HORRIBLE AND UNUSABLE.
Before we get to that, let’s talk about what this post should be. A generally favorable review of Safari, with a few mild frustrations that, if fixed, would make it perfect. For example, I wish there was a way to make bookmarks and favorites open in new tabs. This should be configurable, on an overall or site-by-site basis. But it’s not. You can force sites that want to open in a new window to open in a new tab, but you can’t set the browser to open your bookmarks, favorites or other links in a new tab. Sure, a setting that caused every single link to open in a new tab would result in tab overkill. But the option to have certain links (perhaps via an option to check a box on the edit bookmark screen) or categories (such as favorites- the ones I most want to open in new tabs) would be simple to implement and would be a great feature for power users. I find the LastPass extension in Safari to be more kludgy than its Chrome counterpart. There are other things that could be a little better.
But I can live with all that.
What I simply cannot, should not and will not live with is THE INABILITY TO SET CUSTOM ZOOM LEVELS FOR THE SITES I VISIT. Safari has native zoom in and zoom out buttons. And they work fine. But I DO NOT WANT to have to click them EVERY SINGLE TIME I VISIT A SITE. A font-size and zoom level that works on a lower resolution or smaller screen is tiny on a 27″ iMac, and I can’t imagine it’s going to be any better on the beautiful new Retina iMacs. Chrome lets you select and retain zoom levels, without doing ANYTHING. Why in the name of Bobby-Elvis and his missing eyeball can’t Safari do this?
Someone is going to point out that you can set minimum font size in Safari, via the preferences. Sure, but have you tried it? Some sites look fine, but many become a jumbled mess. Need to see what I’m talking about? Set a largeish minimum font size and go to Feedly. A horrible, unnecessary mess.
Yes, I looked for an extension. There is one, but it doesn’t work on any of my Macs running the current version of Safari and Yosemite. Yes, there may be complicated workarounds that let you impose custom CSS functions, but those break as many things as they fix.
At the risk of sounding like a baby: I WANT CUSTOM AND STICKY ZOOM LEVELS IN SAFARI AND I WANT THEM NOW!
But since I don’t have them, it’s back to Chrome for me.
I’m a devoted Mac user, with interconnected (via Google Drive and Back to My Mac), backed up (via Time Capsule and via Arq backing up to Amazon Glacier), and secured (via multiple, redundant means) iMacs at home and on the farm. These beautiful, powerful devices communicate and interact beautifully with my Macbook Air, iPad Air and iPhone. It all works beautifully, and elegantly, except for one little problem.
I have a job. Where I am forced to use a locked-down Windows computer. A committed Apple-loving geek being forced to work on a walled-off Windows machine all day is a recipe for disconnected frustration.
There are shortcuts, hacks and workarounds for most of my workflow. I use Google Drive, IFTTT and Hazel to move documents around, and to keep them in their desired locations. After years of managing a single contacts list via Google Contacts, Google’s insistence on jamming my contacts into Google+ and Hangouts and my desire to have a small, manageable personal contacts list led me to separate work and personal contacts, with my work contacts located inside the Outlook prison on my work computer and my (very limited) list of personal contacts residing in iCloud, and my various Apple devices. I used to think having two separate contacts lists would be burdensome, but the increasing integration between Apple contacts and various apps-and my desire to avoid inadvertently sending personal content to work contacts- made me a believer in separate contacts lists. In other words, my inability to sync my Outlook contacts with my iCloud contacts (and thereby my various Apple devices) led me to embrace a better, separate solution.
As an aside, I think work contacts are going the way of newspapers and record labels. I almost never resort to my work contacts list. Rather I search my emails (instantly via X1) to find the email address or telephone number I need. If that fails, I Google it.
I have always had separate work and personal email addresses and accounts, which has been and will always be preferable. Again, my inability to access my Outlook email via iCloud or my Mac has never been a problem. After all, both sets of email and both contacts lists are easily accessible via an iOS device, even if not be via a Mac.
Such is not the case for my calendar. Unlike email and contacts, I very much desire a single, unified calendar. Also unlike email and contacts, accessing multiple calendars via an iOS device alone is not a happy solution for me. For years, I kept my calendar on Google, and pushed (not synced) my Outlook calendar entries (consisting mostly of accepted meeting invites) from Outlook to my Google calendar via the recently deprecated Google Calendar Sync. Sadly, this no longer works and there is no acceptable substitute.
Which leaves me with the Hobson’s choice of having two separate calendars or having to manually enter every single Outlook calendar item in Cloud or the calendar application on my Apple device. The latter is simply unworkable, given the large number of calendar entries I have. The former is extremely unsatisfactory. There is just no answer for a Mac-loving geek forced to work on a locked-down Windows computer.
Until I find a better solution, I am currently using a less than ideal workaround, via which I repurposed two of my old iPads as dedicated calendar devices, each hung on the wall in each of my offices, and each displaying my combined calendars, via Fantastical. Because Fantastical can display multiple calendars, at least I have a unified calendar to look at, without having to pull out my iOS device each time. This is horrible solution, but it’s the one I have.
I wish there was a better way to solve my calendar conundrum, but for the time being this is the best I have come up with.
What I really wish is that Macs had infiltrated corporate America long ago, so that I could use a Mac at work. This is probably never going to happen- and will certainly not happen in my lifetime- so the best I can do is keep looking for some hacked up workaround that will allow me to live semi-efficiently within the frustrating digital walls I cannot climb.
I’ve already talked about my most useful IOS applications. Let’s move to the desktop and discuss a few apps that materially add to my flow and efficiency. These apps increase my productivity and make my life easier, and they can do the same for you.
Let’s start with one app that’s already on your Mac. Automator, which can be found the Applications folder, can automate repetitive tasks and save you a lot of time. For example, I created a process in Automator that automatically monitors a specified folder for image files, renames them to the convention I use for my blog, and resizes them to the desired size. Another service I created in Automator automatically combines selected PDF files with a right-click. Far too many people don’t use-or even know about Automator. That’s a shame, because it is possibly the single biggest timesaver on my Mac. And you don’t need to be a programmer to use it. You can set up all kinds of time saving processes by dragging and dropping.
A related app that I rely on heavily is Hazel, the automation program from Noodlesoft. While similar to Automator, Hazel is even more powerful and can automate an almost infinite number of tasks (it can also incorporate Automator into its actions). For example, as part of my paperless filing and storage system, Hazel monitors my Document Inbox folder for PDFs, converts them to searchable format, renames them based on their contents, and moves them to the appropriate folder. In other words, all I have to do to file my papers is scan the file, and Hazel does the rest.
Another efficiency boosting app is Bartender. It allows you to manage your Mac menu bar, and to arrange the resident applications in your desired order. The ability to reorder menu bar applications is well worth the $15, without consideration of all of the other useful Bartender features.
Probably my favorite new Mac app is Unclutter by Software Ambience Corp. Unclutter places a virtual storage shelf (they call it a digital pocket) at the top of your screen, where you can store clipboard contents, files and notes. Dropbox and iCloud integration allows you to sync this content across your various computers. This has become my go-to way to share individual files between my iMacs.
And, as a bonus app, there’s Dropbox. While Dropbox is awesome, just as a way to back up, sync and share files between desktops, laptops and mobile devices, its true power is its integration with and/or use beside other applications. This allows you to create a lot of extremely powerful automations. For example, bills and other documents scanned at the farm are scanned into a folder monitored by Hazel. Upon receipt, Hazel moves the files into a specified Dropbox folder, where they are synced to my home computer. When they reach my home computer, the Hazel app on that computer performs the searchability, renaming and moving functions described above, to place the files in their permanent folder. Mostly all I do is scan them. I say mostly, because sometimes Hazel has a hard time figuring out what the document is, so it can appropriately rename it. In that case, all I have to do is rename the files, after Hazel converts them to searchable format. Dropbox also integrates with the wonderful IFTTT, which allows a ton of automated flow. For example, I use a combination of Dropbox and IFTTT to place automated farm rain logs, photos, locations and other entries in my DayOne journal.
All of this is like a giant erector set for adults. Jump in, build something, create some free time. I about to watch the Walking Dead with some of mine.
I’ve used a ton of image capture and annotation apps, from Evernote web clipper, to various Chrome extensions, to Snag-It and beyond. Today, while reading my feeds and trying not to freeze, I read about Napkin, via iMore.
I was a little skeptical, especially given the $40 price tag. But after reading up on it, I took a chance. I’m really glad I did. In sum, it does just about everything you could ever need a capture and annotation app to do. I made and shared this in about 60 seconds.
Here’s a video showing some of the features of an slightly older version of the app.
My once favorite blog, Cult of Mac, has responded to the predictable outcry over its hawking of the extremely controversial MacKeeper software. Did they respond by actually installing, using and (this is important) trying to uninstall the program? Nope. They just did some Google searches and concluded, mostly, that it’s all good.
Except it ain’t.
As I noted before, I’ve never used MacKeeper and I never will. I don’t need to test my suspicions about it, because the marketing strategy alone (pop-unders, ripe for abuse affiliate program, etc.) tells me all I need to know.
Here’s MacKeeper’s PR manager’s explanation for that strategy:
We believe that we have a great product and we want people to know about it and the only way to do this is to explore every medium of advertisement.
What they want is to make money. Cash. Bucks. A desire they seem to share with Cult of Mac. If the program is so awesome and this is all about informing the unsuspecting masses that their Macs are in great danger, there would be no need for sketchy marketing and ineffective uninstallers. It’s not even about whether MacKeeper is good or bad; it’s the way they go about it.
But I don’t really care about MacKeeper.
What I care about is the fact that I can no longer trust Cult of Mac. If I have to wonder whether every app or service I read about on Cult of Mac is a great benefit or disguised malware, Cult of Mac is useless to me. If Cult of Mac’s response to that question is a Google search and some second hand anecdotal gibberish, in lieu of first hand analysis, then it’s not just useless- it’s dangerous.
I hope Cult of Mac made a butt load of money selling MacKeeper to its readers. Because they paid a big price in the process.


 What I simply cannot, should not and will not live with is THE INABILITY TO SET CUSTOM ZOOM LEVELS FOR THE SITES I VISIT. Safari has native zoom in and zoom out buttons. And they work fine. But I DO NOT WANT to have to click them EVERY SINGLE TIME I VISIT A SITE. A font-size and zoom level that works on a lower resolution or smaller screen is tiny on a 27″ iMac, and I can’t imagine it’s going to be any better on the beautiful new
 There are shortcuts, hacks and workarounds for most of my workflow. I use Google Drive,
  Let’s start with one app that’s already on your Mac.

