
Because I am the only tech-interested person amongst my real life friends, I often get asked tech questions, and am occasionally asked for recommendations with respect to hardware, software and ways ways to use the same.
I thought it might be time to do a series of posts describing the primary hardware and software I use in my day-to-day life to get things done, to make life easier, and to have fun. Let’s start with computers and backup. Then we’ll move to mobile devices, software and apps.
Primary Computer

My primary computer is an early 2015 MacBook Pro, with a beautiful retina display. For many years, I was a dedicated desktop computer user. I’ve always had an ancillary laptop- for the last several years a 2011 MacBook Air. But until recently, my laptop was used as a secondary device, mainly for use on the road or for light use on the couch. I couldn’t help but notice, however, that much of the rest of the world, including the rest of my family, was rapidly gravitating toward laptops as primary, full-time computers. Since I travel reasonably often, for business and to give speeches, and since I am spending more and more of my non-work time at the farm, I began to wonder if I could be happy with a laptop as my full-time device. Several months ago, I went to the Apple Store and looked at the retina MacBook Pros, and quickly concluded that I could. I am deliriously happy with my MacBook Pro. The solid state hard drive is fast, the screen is a work of art, and it’s great having all my apps and data with me all the time. I’ve also enjoyed the move from a desk chair to full-time couch computing.
Grand Central iMac

My 2014 retina iMac, which was previously my primary computer, has now become command central for administering and distributing my data, movies, music and home network. For example, my Fujitsu ScanSnap iX500 scanner (the best scanner on earth) remains connected to the iMac and I scan most of my documents (I have long been almost completely paperless) to that iMac. I have Hazel (the first application for people looking to take control of their Macs) rules set up to OCR and manage the scanned documents (including incoming files scanned on other devices, which I move to the iMac via Dropbox).
This may sound complex and hard t0 set up, but it’s not. Here are all the steps needed to set up the scanned documents management I just described.
1. Create a primary folder on the computer where you want to store your documents (in my case my iMac) to receive your scanned documents. I have one called Document Inbox. Scan your locally scanned documents to this folder. Create a Hazel rule to monitor this folder, OCR any new documents that are added, and add a specific color tag (so you can visually see the documents that have been OCR’ed via Finder).
2. Create a synced Dropbox folder on all your computers to receive and manage documents scanned from other computers. I call mine Remote Scans. Create a Hazel rule on the computer where you want to store your documents to monitor this folder, and move (not copy) any added documents to the folder you created in step 1. Scan or move your remotely scanned documents to that folder.
3. From time to time (I do this once every couple of months), go through the folder you created in step 1, and rename (optionally) and move (again, not copy) the documents to their final storage location, in my case subfolders in my Scanned Documents folder, which resides inside my Documents folder. Those lucky many less anal than me could simply leave all the scanned documents in a single folder and rely on search to find them as needed. I’ve got so many years invested in organizing my documents by type, I am not emotionally ready to combine them into a single folder, but it would be much easier, and logic tells me that might be the way to go.***
4. Set up file sharing on the computer where your scanned documents will reside so you can access the scanned documents from your other computers on the network. I have the folder on my iMac mounted in Finder on my MacBook Pro, so I can view, move and manage the documents from my laptop, when I’m on the same network (e.g., at home). In fact, I do almost all the renaming and filing work described in step 3 from my MacBook Pro. Set up permissions to require your computer password (e.g., “connect as” your user account on the computer where the documents are stored) to keep your scanned documents safe from network creepers.
*** You can create all sorts of Hazel rules to rename and move documents automatically, but it takes some geekery, and in my experience only works sporadically. If you want to explore this magic, Brooks Duncan is the place to start. His Hazel webinar is highly recommended. As is David Sparks’ paperless field guide.
I use Carbon Copy Cloner (the best clone and sync application) to keep the Documents folder on my iMac synced with a folder on my MacBook Pro. Carbon Copy Cloner allows me to create a clone job that occurs whenever my MacBook Pro and iMac are on the same network (e.g., when I’m at home).

I also keep my primary Photos app (formerly iPhoto) library on the iMac and sync it to my laptop and other devices via Apple’s photos in the cloud service.
I keep my active text files (via Pages) and spreadsheets (via Numbers) synced via iCloud, and I keep my historical documents, song demos, songs-in-progress, Garage Band files and archived data in subfolders in the aforementioned Documents folder. To allow for moving things around (including to and from my dreaded and mandatory Windows work computer) I have a designated Google Drive folder (which I call Transfer) that resides in my Finder sidebar, and in whatever they call the Windows equivalent (the Windows Explorer sidebar?).

I use Spotify for most of my music needs (here’s Rancho Radio, my actively managed and hand-crafted station; try it, you’ll like it), but because I’m a musician and, mostly, because I’m old, I have many tens of thousands of MP3s. I keep those archived on my iMac and accessible in the cloud, thanks to Google’s most-excellent Google Music service. If you have a lot of MP3s to manage, it is clearly the best choice. I keep selected parts of that collection on dedicated flash drives that I plug in to the applicable computer to play via my beloved Sonos system (I’m getting ahead of myself, but the highest and best use for old iPads and iPods is as a dedicated front end for Sonos). Here’s what I’m listening to now, courtesy of an old iPad I’ve repurposed.

Backups and Content Serving

Additionally, I use Carbon Copy Cloner to back up both my Documents folder and my Photos library from my iMac to an old Apple Time Capsule (previously my primary backup device) and to the third device in my computer array- a Synology DiskStation DS415play, which I use to back up my data and to serve videos and music to my house (and afar) via Synology’s excellent iOS and web apps. All of this is automated, and happens on a designated schedule.
I also back up my MacBook Pro, via Time Machine, to two separate encrypted external hard drives attached to my Apple Airport Extremes (which also serve as my routers), one at home at one at the farm. This allows duplication in separate locations. My iMac is backed up to that same external hard drive at home, and to the Synology DiskStation (again, for duplication). I am not as backup paranoid as some, and have never restored a complete drive from a backup (I would simply copy back the documents and files I need), but it’s so easy to backup with my system, I can achieve redundancy with very little effort.
Online Backup
Historically, I have backed up the data I care about (e.g., files, photos, videos, song demos, music, etc.) on my iMac to Amazon Glacier using Arq, as outlined here. While that process is cheap and easy, I will probably move my cloud backup either to Amazon’s Cloud Drive (unlimited for $60 a year) or Google’s new photos service (at least for videos, which are, by far, the largest component of my backup jobs, and maybe for photos if Apple continues to overcharge for cloud space).
I know this sounds like a lot, but it was surprisingly easy to set up. At the end of the day, it gives me redundant local backup, as well as offsite backup for the data I care about.
Behind the Lines: Mac Mini
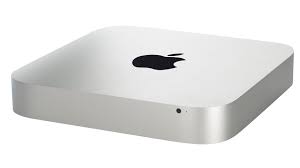
Oh, and last and definitely least at least in terms of size, I have a 2014 Mac Mini in my downtown office, which I use to do as much office work as possible on a Mac. I’ve spent a lot of time trying to insert my Mac workflow into a locked-down Windows environment. There’s no perfect way to do this, but as Macs continue their glacier-like move to enterprise, I’m hoping it will get easier. Maybe I’ll do a post in this series about all the work-arounds I’ve hacked together to use my Mac in an enterprise environment. Just finding a way to play old Lucent voice player files (the format many of my archived voice mail messages are in) was a months long crusade. But, hey, I won (my battle was fought with the persistence required to find a copy of the long ago deprecated Lucent Voice Player, and the very handy Mac app CrossOver). So there.
Next time: phones, tablets, and whatnot.
