Technorati: I’m Open in the End Zone

Technorati

As anyone who reads this blog knows, I have become a customer evangelist for Technorati. I think it is the backbone of the blogosphere and use it daily to find posts to read on whatever topic I am thinking about at the time. I also use it to find inbound links so I can return the link via the Most Recent Inbound Links list on the right side of the main Newsome.Org page.

I’ve had technical problems with Technorati before. Dave Sifry threw me the 99 yard pass of tech support back in December. After that, things worked great, for a while. Then I noticed some hiccups. First, some of my own posts started showing up in my inbound links search results. Then my posts went away, and I thought the problem was fixed. Then about half of my inbound links just disappeared, with no links over 21 days old appearing in my search results. Then the list kept shrinking.

As of today, the oldest link that shows up is only 19 days old. My link numbers are less than half what they were a couple of weeks ago.

I wrote Technorati via the contact link several days ago. No response yet.

I have been hesitant to even mention these problems because I figured Technorati would fix whatever the problem is and I couldn’t be sure that this problem wasn’t unique to me. Then I read this post at The Blog Herald, and the comments thereto. It seems I am not the only user experiencing problems.

I still love Technorati. And I believe these problems will be fixed. I just hope they are fixed soon so I can continue to rely on Technorati.

Dave, I’m open- hit me!

UPDATE: Once again, Dave comes to the rescue (via the Comments below). Technorati is growing fast, and there will always be growing pains when you have to scale at the speed of clicks. But they are building a ton of goodwill and a legion of customer evangelists by being a positive and responsive presence in the blogosphere. I really like this company a lot. Maybe when they get huge I can be their Scoble!

Dave indicates in a comment to The Blog Herald post that third party pingers may be causing some of the problems. I am going to take Dave’s advice and only ping Technorati directly from now on. I suggest that anyone having similar problems do the same.

Technorati Tags:

Inbound Links Tutorial

There are probably a ton of handy plug-ins that do this for people using WordPress, Movable Type and other blogging platforms, but for those of us who don’t have a handy plug-in, I have been trying to figure out how to get a semi-automated list of “Most Recent Inbound Links” to appear on my front page. It’s a work in progress, but here’s what I’ve come up with so far. You can see the list in the right hand column.

First, I began bookmarking inbound links that I notice via Technorati and Google searches (those links are in the left hand column under “Other Blogs”) at Del.icio.us with the tag “inbound” (any tag will work as long as you only use it for inbound links). Since I use Firefox, the Del.icio.us extension makes this very easy. I don’t add any comments (one of the optional fields when you make a Del.icio.us bookmark) because I just want a list of links, but it would work fine with comments if you want to show excerpts, etc. The bookmarked inbound links then show up on the “inbound” (or whatever tag you use) filtered Del.icio.us page. Mine is here.

Note the RSS button at the bottom of that Del.icio.us page, indicating that there is an RSS feed for those bookmarks. Next I had to convert that RSS feed to javascript so it can be displayed on this page. I tried a bunch of different approaches, but the one that (so far) works the best is to run the RSS feed through Feed Digest, play with the display options via your Feed Digest Control Panel (I got rid of the default table structure and just made it a list of links with the date above them). Once you get the links to display the way you want (which Feed Digest makes pretty simple), you’re almost ready to go.

You can drop the javascript generated by Feed Digest right into your page if you want. When I did that, however, it didn’t display correctly and messed up my formatting.

So I made a separate html page- inbound.html, fixed the formatting on that page to my preference and added a server side include (like I use for the CD and book lists in the right hand column) to fetch and display that page.

It seems like a roundabout way to get there, but it seems to work so far. I’m going to test it out for a few days and see how I (and those who link here) like it.

It is only semi-automatic, however, because you still have to bookmark your inbound links via Del.icio.us. Like most people, I check my inbound links fairly often looking for cross-blog conversation opportunities, so I don’t find this to be burdensome. Plus, it serves as a filter for spam links.

There may be better ways to get there (short of changing my blogging platform). If so, I’d love to read about them in the Comments.

Technorati Blues – Again

Technorati

It took me about forever to get Technorati to index this site. After much angst, a few emails and the inclusion of bookmark links, indexing began and my tags were picked up. That was months ago.

Now, suddenly, for no reason and after no substantive changes to my template, Technorati simply will not index this page. It just doesn’t happen. Based on my prior experience and the recent experience of others, I doubt emailing tech support will work and I’m not going to bother David Sifry.

My individual post pages will get indexed if I ping Technorati from them, but that’s not the preferred way to do it because it creates bunch of messy links back to Newsome.Org and it messes up my link count.

Granted, there are a lot of markup errors in my template, but, but, but:

1) Most of them are in the sidebars, where I have to rely on third party javascript, etc.

2) I have fixed most of the errors in the actual post template.

3) Most importantly (to the exclusion of everything else, at least in my frustrated mind) this page was being indexed for months without a problem.

I am really frustrated by this. I think Technorati is a great site and I use it as a de-facto category system here. But when it won’t index this page, it really screws me up.

Technorati Tags:
,

Exactly How to Make a Podcast

podcastingNow that I’ve moved from doubter to cautious believer with respect to podcasting, it’s time to pull back the sheets and show non-geeks exactly how to make one. I have tried several ways and this is what I’ve settled on.

Step One: Gather the songs you want to include in your podcast.

Always be aware of the elephant. I tend to pick songs by new bands that, hopefully, will appreciate the exposure or songs by artists that I hope are cool enough not to care if I use one of their songs. I also add links to places listeners can buy the records and encourage them to do so during the podcast.

I pick songs by browsing through my MP3 collection and adding potential choices to a Playlist I cleverly call PC (for podcast, not personal computer or political correctness). I have tried all the major and many minor music players and the one I use for my large music library is Media Center. I’m sure others will work too, but I haven’t used them for this purpose. After I have selected some possible songs, I go back and weed the list down to 6-8 songs, less if I’m going to talk more and more if I’m going to talk less. That way, the podcast will be around a half hour long, which is what I currently shoot for.

Once I get the PC Playlist down to the number of songs I want, I copy those songs to another folder on my computer (I call this folder PC Holder and keep it on my Desktop for easy access). I do this because I don’t want to accidently edit or delete a song from my music collection when I am creating my podcast. Media Center makes this very simple: Open your Playlist, select all the songs with your mouse (press shift and page down from the top song) , right click on the highlighted songs and select Library Tools>Copy Disk Files (not Move Disk Files). In the pop-up box navigate to the target folder (in my case, the PC Holder folder) and click OK.

If you use another music player, you can figure out your own system for selecting and relocating the MP3s you want to include in your podcast. The important thing is that at the end of Step 1 you have selected the MP3s you want to play and copied them into your podcast folder.

Step Two: Import your MP3s into your podcast program.

Once we have the MP3s ready, we have to combine them into a single sound file and add the voice files (announcements, discussion, etc.) that will be part of the podcast. I use and highly recommend Audacity for this purpose. It’s free and relatively easy to use. If you don’t have it, download and install it.

Once you’ve installed Audacity, open it and select File>New (see the menu near the top of the program window) to start a new podcast project. Now let’s import the MP3s from our folder. Select Project>Import Audio, then navigate to the folder where you stored your MP3s, select them with your mouse (again, press shift and page down from the top file to select them all) and click Open. The MP3s will be imported into Audacity and will show up as sound files in the program window. On the left of the Audacity window is a column that shows the name of the MP3 song file and has several buttons, including Mute and Solo. The Solo button allows you to listen to the files one at a time to be sure the file imported correctly and sounds good (Click that button and then the Play button near the top of the program window).

Step Three: Record the voice files

Now it’s time to record the talking part of the podcast. I record a voice file to open the show, a separate voice file discussing and introducing each song (except that the opening voice file doubles as the introduction for the first song) and a voice file to close the show. You have to to separate files so you can move them to the correct place in the sound file (more on that below).

Once you have your microphone connected and turned on (here’s a help page for that), recording the voice files in Audacity is as simple as clicking on the red Record button near the top left of the program window and talking into the microphone (be sure to click the Stop button when your done). The first time, you’ll have to experiment a little by recording test files and then playing them back (click the Solo button to the left of the voice file and then the Play button near the top of the window) to get the right volume on the voice files. Audacity has an amplify feature- select the sound file with your mouse by left clicking at one end of the sound file (the blue wavy lines, 2 per song, in the middle of the window) and moving the mouse to the other side of the sound file, then select Effect>Amplify, choose the desired level of amplification and click OK. This works sometimes, but it’s better to get the microphone levels right from the start.

I record all of the voice files at one time- by clicking the record button, talking and then clicking the stop button. If you mess up (and you will, often) simply delete the voice file (see the little X in the button area to the left of the song file) and start over.

Step Four: Put the songs and voice files in order

Once you have the song and voice files completed, you have to put them in order. This takes a little time (I wish there was a way to do it automatically, but I haven’t found that feature if it exists). To do this, left click and drag the files into the correct order. Think of the files in the Audacity program window as a ladder, with the first file (normally the introduction voice file) at the top and the last file at the bottom. If dragging the files with your mouse it too hard, you can move a file up or down via the little downward pointing arrow in the button area to the left of the sound file.

Once you have dragged the files to their proper spot on the ladder, you have to move all of them after the first one to the right so the files play sequentially and not all at the same time. To do this, click on (to the right side of, if you have to move it a long way) on the sound file you want to move at the location where you want that file to start and select Project>Align Tracks>Align with Cursor. Normally the location you click is even with the end of the sound file immediately above (so this file will play immediately after the one above it ends).

Again, this takes a little time, and it should be automated, but once you get the hang of it, it’s pretty quick and easy.

Step Five: Test the soundfile

After aligning the files vertically (for which ones play first) and horizontially (so they play in sequence and not at the same time) click at the beginning of the first (i.e., top) sound file and click the Play button near the top of the window. Listen to the music and voice files and make sure everything is in order and sounds good. If not, reorder or rerecord the necessary files.

Step Six: Save the Audacity project file

Save the project file by selecting File>Save As and navigating to the folder where you want to store your podcast project files. I store mine in a folder in My Documents called RanchoCasts.

Step Seven: Export the combined soundfile

Select File>Export as MP3, name the file (I use ranchocastmmddyy) , navigate to the folder you want to use to store the combined sound file (I use the same one I previously moved the MP3s to) and click Save.

Step Eight: Upload the combined sound file to your server

I have a folder on my server called ranchocast where I upload the combined sound file, which will shortly become my podcast. If you don’t have a server, there are some podcast hosting companies, but I haven’t used them so I can’t comment on how well they work. I use CuteFTP to upload my files, but any FTP program will work.

Step Nine: Create your RSS feed

In order to be accessible by the programs that download and manage podcasts (such as Juice, formerly called iPodder), an RSS feed has to be created. This can be the most difficult part of creating a podcast, but thanks to ListGarden it has been made easy.

ListGarden, which is both brilliant and free, takes the location and name of your sound file and creates, saves and uploads the necessary xml file that will support an RSS feed.

Here are step by step instructions on how to set up a podcast using ListGarden and the sound file you just created and uploaded. ListGarden has some advanced features (like the ability to generate a web page about your podcast) which you may or may not use. The process of setting up ListGarden is easy if you follow the step by step instructions closely- the hardest part is knowing the location of your podcast folder on your server and your name and password for server access. If you forgot your password, you can probably get it from your FTP program with Behind Asterisks. I have to do that all the time.

Step Ten: Publish your podcast feed

Once you have uploaded your music file and used ListGarden to create and upload an xml file, all that’s left is to publish your RSS feed so people can find and access your podcast. I use Feedburner for this and it does a great job. Add the URL to the xml file that ListGarden created and uploaded in Step Nine to the blank on the Feedburner page and you’re on your way.

The URL is different from the server location address you used when configuring ListGarden. The URL is the “http” address that a browser would use to locate that file (for example, http://www.newsome.org/ranchocast/ranchocast.xml)

Once you get your Feedburner feed set up, Feedburner gives you a link- and this is the link you use to direct people to your podcast. My Feedburner podcast page is http://feeds.feedburner.com/ranchocast. One of the cool things about using Feedburner to publish your podcast is that your listeners can click the Listen icon on your feedburner page and listen to the podcast right from that page (without having to install Juice or another podcast manager).

That’s it. If you do a podcast, leave me a note in the Comments. I’ll check it out

Technorati Tags:

Tech Tips for Tweeners: Buying a Tablet PC

babycomputer

One of the primary purposes of Newsome.Org is to introduce and explain computer-related programs and features to other in-betweeners like me- people who are the parents of our children to whom computers and the internet are as integral as the telephone and the children of our parents who will never fully embrace technology.

I’ve posted before about my transition to a Thinkpad X41 Tablet PC and how much I like it. My conclusion is that a convertible Tablet PC will do virtually everything a traditional laptop will do, so why not chose one that does both- like the excellent Thinkpad X41.

JKOnTheRun posted an excellent Tablet PC buying guide the other day. There are various types of Tablet PCs available and his post does a great job of helping you decide which one is right for you.

My Tablet PC selection came down to a couple of decisions:

1) Convertible vs Slate. For me having a keyboard is simply a must. I tried it the other way, and it was just too hard to be really productive on the road. The one without the keyboard is great for checking email by the pool, but was not good for writing or editing documents.

2) Weight vs Extras. This was harder for me, as I am not bothered by a few more pounds if I can get extras like a DVD burner, more ports, etc. I ultimately chose the X41 (lighter with no DVD drive) because a lot of my work on the road is done in airplanes and the X41 is the perfect size and weight for easy airplane use.

I chose a lighter, convertible model, for the reasons stated above. But before you run off and buy one read and consider the issues and tips in JK’s post.

Technorati Tags:

Tech Tips for Tweeners: Maxtor Network Storage Drive

babycomputer

One of the primary purposes of Newsome.Org is to introduce and explain computer-related programs and features to other in-betweeners like me- people who are the parents of the youngsters to whom computers and the internet are as integral as the telephone and the children of our parents who have no intention of ever using computers.

I have a pretty extensive home network. Most rooms and all bedrooms have wired network access leading to a Linksys 10/100/1000 Router. I also have a secured wireless network with access points upstairs and downstairs. It works fine except for one thing: backup.

The computer in my home office is so loud that putting another computer in there for backups simply isn’t an option. Raina’s office is too small (and chaotic) to accomodate another computer. The kids don’t and won’t have computers (or TVs) in their rooms. With the pending arrival of child number three, we’re down to one guest room that cannot double as my backup server room. Even when I had my backup server in that room, it was not a good solution. Everytime we lost power and often when we didn’t, that computer would be down or inaccessible over the network for some reason- requiring me to trudge upstairs, reboot and hope.

So, I decided to find another solution. After considering and quickly rejecting online backup, I elected to try network storage- specifically Maxtor’s Network Storage drive. Here’s the skinny.

Basically, a network storage device is an external hard drive that has a network connection and can be accessed from other computers on the network. After installation, it appears as a hard drive just like the other hard drive(s) on the computers.

maxtor_shared_storage-769255
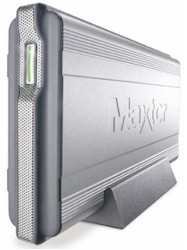
The Maxtor drive was a breeze to set up and install. You take the drive out of the box, plug it in, attach the included network cable to the drive and then to your network outlet, and turn the unit on. Then you insert the included CD on each computer you want to access the network drive and follow the step by step instructions to set up an access ID and password. It is that simple. Without cracking the instruction manual, I had the drive up and running and accessible by three computers in under 15 minutes.

The drive has a USB port that supposedly allows you to connect additional drives and increase the capacity. I haven’t tried that, but if it works it’s a very nice feature.

My only mild complaint is that the software you install on each computer to allow access to the network drive automatically creates a bunch of folders on the network drive (My Documents, My Music, etc.). I am not a big fan of the “My” naming convention. Fortunately, it was easy to rename or delete the created folders.

So what does this do for me? It gives me the very important backup capability without the necessity of maintaining a second computer. Plus, the network drive is much smaller and easier to place than an entire computer, monitor, keyboard, etc.

This is a great product.

Technorati Tags:
,

Tech Tips for Tweeners: Wireless to Go

babycomputer

One of the primary purposes of Newsome.Org is to introduce and explain computer-related programs and features to other in-betweeners like me- people who are the parents of the youngsters to whom computers and the internet are as integral as the telephone and the children of our parents who have no intention of ever embracing computers.

These days almost everyone has a work laptop and those of you who don’t soon will. Wireless network connections for connecting to a home or office network and the internet are becoming commonplace in offices and in hotels. In fact, the Days Inn in Cheraw, SC has something the very upscale Barton Creek Resort and Spa doesn’t have- free, high speed wireless internet!

In any case, wireless networking has gone mainstream and most newish laptops have wireless network capability. This is helpful for home networks- we have a secured wireless network at our house that allows me and our guests to use our laptops anywhere in the house. Wireless networks in offices allow visitors to connect to the internet in conference rooms. Wireless networks in hotels allow you to use your laptop from the easy chair, bed, etc. The problem is that many hotels, even nice ones, don’t yet have wireless networks. Rather, they have a cable-connected network, usually via a little box on the desk. This works fine until you want to move to the easy chair on the other side of the room- beyond the reach of the network cable.

54gs-701917

Well, thanks to Linksys there’s a cheap and easy solution to this problem. I bought a Linksys WTR54GS Travel Router from Newegg for $79.99. I took it on its first business trip last week, and it was invaluable. Here’s how simple it was to use.

I plugged it into the electrical outlet in my hotel room (the built in plug is retractable for easy storage). I plugged the hotel room network cable into the router (the router comes with its own network cable just in case the hotel room or other location doesn’t supply one). I turned on the router. Immediately I had a fast, stable network connection. Simple as that. I didn’t even need to use the installation CD that came with the router.

Granted, my instant network was unsecured, but it’s easy to set up a secured network and you only have to do it once. After that, a secured network is equally instant.

The router is small and comes with a handy carrying case for the router and the supplied network cable. All in all, this is a must have for the frequent traveler.

Technorati Tags:

Extreme Website Makeover (Part 2)

This is the second in a two part series. Part 1 is here.

In Part 1 I talked about redesigning Newsome.Org and shared some things I learned in the process.

paint

Here, also in no particular order, are some other things I have learned.

5) While a nice, functional design is important (for example, I love to read John Dvorak’s blog, but I find the layout and design, particularly the middle part where the primary content is, to be distracting), content is king. Content can be many things: new or helpful information, humor, or just your thoughts on the latest episode of Lost. In fact, several of the blogs I read regularly are primarily online diaries where the blogger discusses whatever happened that day. I used to have a friend (where are you Steve Garner?) who could tell a story about taking out the trash and keep the whole room enrapt. If you provide useful and interesting content, you will eventually get readers. Granted, it’s hard to think of something useful to say every day (much less several times a day), and post shrinkage is a common traffic killer. The saving grace is that every post does not have to be a full length article. People like to connect and maintain a connection. Even a short comment or interesting link will keep me coming back to the blogs I read.

6) Make it a 2-way street. I learned when developing ACCBoards.Com that you can get a click or two pretty easily. The trick is to create and encourage conversations. Once people start conversing, a community begins to form and people will spend more than a few seconds on the site. The so called “A-List” bloggers understand this, and they often carry on discussions about common topics spread over their sites. Once you get used to “talking” via trackbacks, comments and common topics, other people will join in. People turn into a group which turns into a crowd, etc.

7) Use media to enhance what you’re saying and doing. Castpost is an excellent site that will host video, currently for free. I have posted one old and one new video project here via Castpost and will post more shortly. Radio Blog is a free program that allows you to post audio files on your site.

8) Get indexed by Technorati even if its hard to get set up. If you keep trying, it will happen. Other sites like del.icio.us , PubSub and Bloglines can help add features and spread the word about your site.

9) Give love to get love. I always link back to sites that inspire me to write about a topic. I always link in my post to a site that I trackback to. If people comment on my posts, I try to comment on their site when I have something to add. Over time, other bloggers will come to recognize your name and be more likely to give you a link or two in return.

10) Have fun and don’t take yourself too seriously. Nothing turns me off more than someone who feels the need to tell me how smart or clever they are. Just be yourself and write about something you find interesting- if you’re smart and clever people will figure that out on their own. Few of us get paid for writing these blogs, so it needs to be fun or it’s a misuse of our precious free time.

Technorati Tags:,

Solving the Technorati Index Problem

Technorati

Here’s a happy cure for my Technorati Blues. This page, which granted contains a lot of XHTML errors, was not getting indexed and I wanted it to be indexed so my posts would show up on Technorati. I don’t know if it was my pleading emails or some changes I made to the HTML on this page, but Newsome.Org is now being indexed by Technorati.

I approached the problem in 2 very different ways:

First, I sent a bunch of pleading emails to Technorati support. I got a response to my first one as mentioned in the prior post, but no response to my fiollow-ups. Nevertheless, there may have been a fix on the Technorati end that kick-started the indexing of this page. If so, thanks Technorati.

Second, I did a little research and added some tags to the html on this page that were designed to make it easier for the Technorati spider to find and index my posts. Immediately after I made these changes my posts started showing up on Technorati, but that may have been a coincidence (though I tend to think not).

Here’s what I did.

While searching for an answer to my indexing problems, I found the Publisher Guide in the Technorati help pages. It contains this paragraph:

How can I better identify each post?

Technorati breaks up your weblog’s home page into smaller sections such as posts and sidebars. You can help Technorati’s spiders properly identify a unique post and its proper link destination by adding a link with a defined relationship of “bookmark” for each post. For example:

<a href=”http://blog.bloghost.com/post1&#8243; rel=”bookmark”>Post title</a>.

That sounded promising so I found the BlogItemTitle section in my Blogger template:

“>/a>

and replaced it with the following text that does three things: makes my title a link to the post page for the particular post in question; adds the above referenced bookmark tag; and includes a second tag for the post title:

<a href=”” rel=”bookmark”title=””>

.Within minutes of pinging Technorati, my posts began showing up.

Technorati Tags:
,